How to Create Engaging Educational Content for Online Learning with Pippit AI
Students in modern digital education demand educational resources that extend beyond traditional text-based materials and static slides. Educational success requires teachers to develop interactive visual content that effectively engages students. Pippit AI by CapCut serves as a powerful, user-friendly platform that helps teachers and content creators convert traditional lessons into dynamic video experiences. This article presents a step-by-step guide to making student teaching videos with Pippit for remote teaching, classroom flipping, and supplemental content delivery.
Use Pippit AI for Educational Video
Teachers who lack technical skills can use Pippit as their all-in-one content creation platform to develop professional-quality videos without facing any difficulties. Users can customize text elements while adding transitions and motion effects to their videos, which they can export to multiple platforms. The platform provides tools that help teachers explain difficult subjects while emphasizing key points and sustaining student focus during the lesson. Through its simple interface and AI-assisted capabilities, Pippit enables teachers to develop content that looks professional while meeting educational standards and distribute it across multiple platforms.
Access the Video Editor
Users begin the process of making engaging educational videos with Pippit by accessing its user-friendly video editor through the platform. Users who log into the platform should select Video Generator, then open the Video Editor. The platform lets you add your teaching materials, which include recorded lessons, along with PowerPoint slides, screen recordings, and demonstration footage. The Upload Media button lets you add files, but you can also move your files onto the timeline through drag and drop. Start by placing your clips on the timeline before moving on to sequence them in an orderly manner. The trimming tool enables you to cut away extra content, which will help create a seamless story progression. A well-structured video layout depends on proper content organization, which requires dedicated time before you begin customization work.
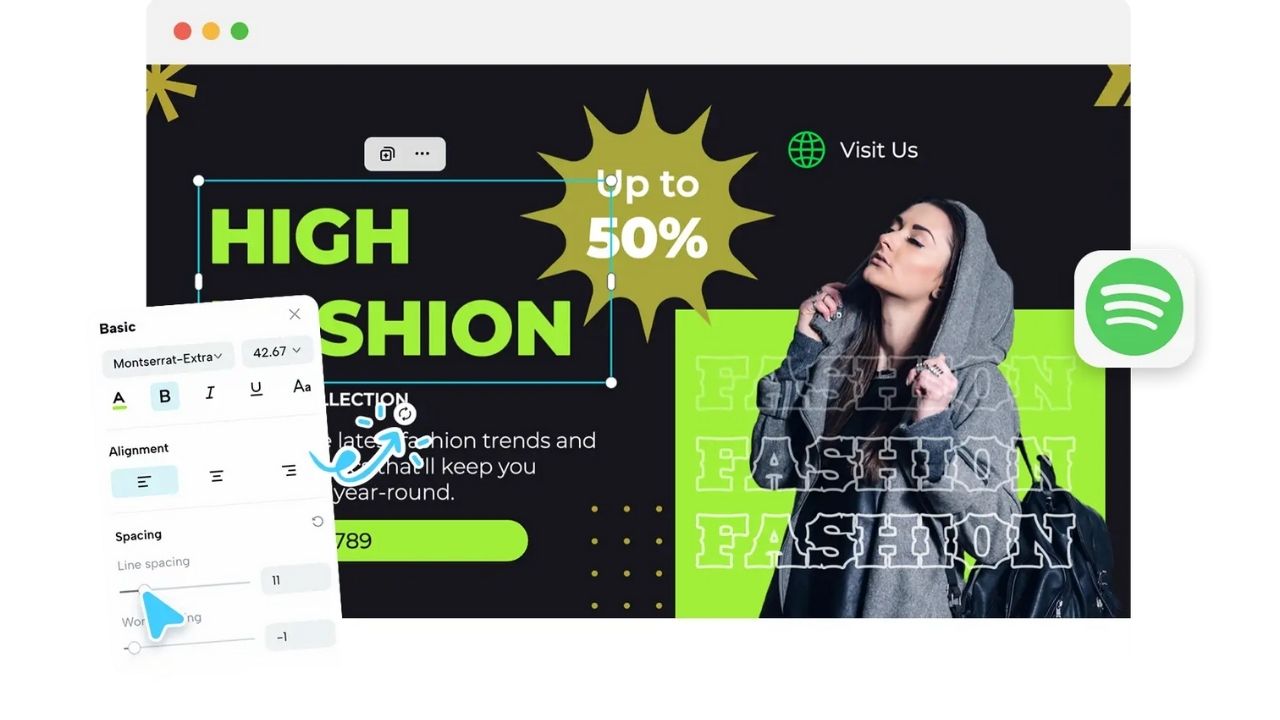
Customize Your Video
The Pippit tools deliver their greatest value through customization features. After uploading and arranging your media files, you should move to the Text section to enhance your video content. You can add:
-
Headings for each section of your lesson.
-
The learning objectives are presented through bullet points.
-
The video contains visual elements that highlight important information through instructions and callouts.
-
The program offers multiple Text Templates for design consistency alongside Text Effects, which create attention-grabbing animated titles.
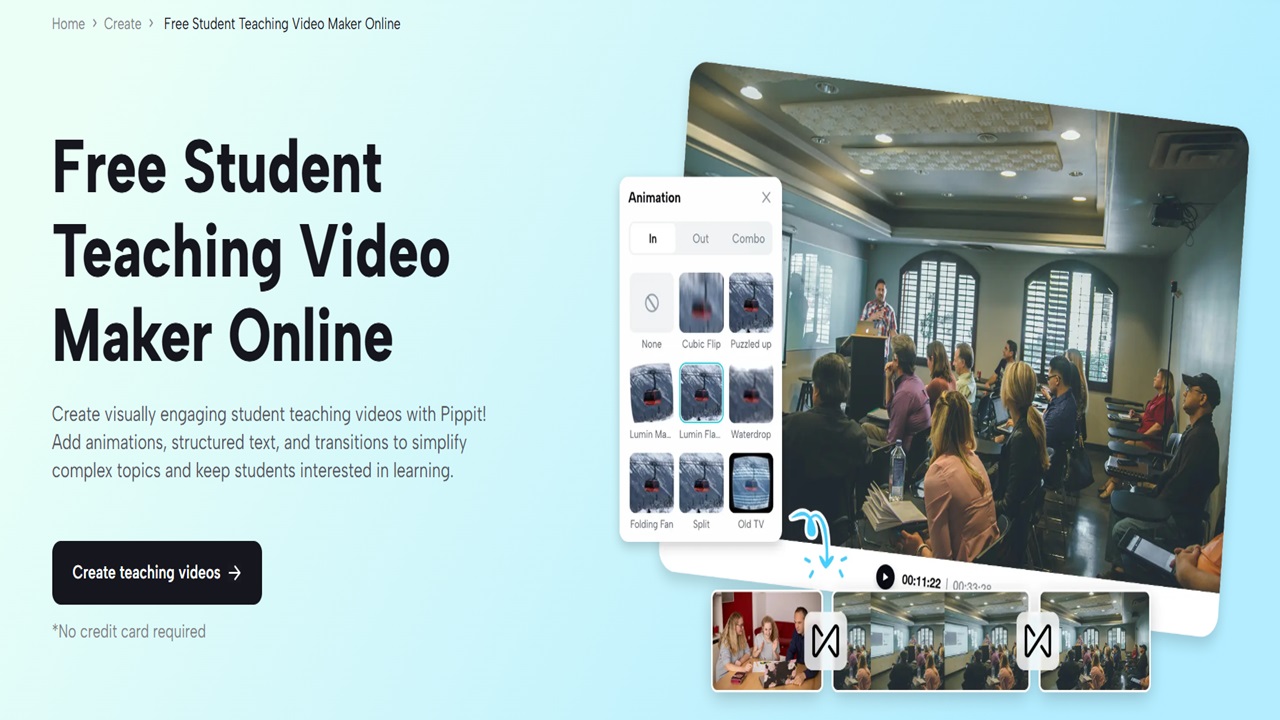
The Elements panel contains transitions along with overlays and motion effects that you should examine. The tools available on the website enable you to make smooth transitions between scenes while also highlighting important points and topic changes through visual effects. A zoom-in effect works well to highlight diagrams, while slide-in transitions work best when starting new concepts. The improvement of student understanding and knowledge retention depends heavily on this step. The combination of structured visuals helps students stay focused while creating lasting memories of the lesson material.
Involves Exporting Your Video for Sharing Purposes
You should export your educational video once you have finished both content creation and visual design work. The Export button exists in the top right corner of the editor interface. You will see a settings window that enables you to modify the following elements.
-
The naming of your video files will help maintain an organized system.
-
The video resolution should be set to either 720p or 1080p based on the platform requirements and personal quality preferences.
-
Choose MP4 as your format since it provides universal compatibility.
-
The frame rate and quality settings let you achieve a balance between video clarity and file size.
Through Pippit, users can choose whether to display watermarks or not according to their branding requirements. The Export button starts the processing of your video after you set your desired configuration. The finished content awaits distribution through YouTube, LMS embedding, or course platform uploading.
Advantages to Users
-
Using Pippit as a teaching tool provides numerous advantages to educators.
-
The platform helps users save time through its drag-and-drop system, AI tools, and template collection.
-
Educational professionals who lack video editing expertise can still create professional-looking videos through Pippit AI.
-
Visual elements, along with animations and transitions, help students stay focused in their learning process.
-
Students from all backgrounds can access educational content through the addition of subtitles and visual annotations, as well as explanatory elements.
-
The platform supports multi-platform compatibility through universal export options, which work for LMS systems, YouTube, and mobile devices.
-
Teaching professionals should experiment with fonts, colors, animations, and effects to create content that matches their educational approach and subject content.
Conclusion
Pippit’s AI technology removes all the technical challenges that usually come with video creation. Educators now have complete capabilities to create content that engages modern learners through their drag-and-drop timeline, rich visual effects, and platform-optimized export features. The process of converting your teaching content into educational videos begins with uploading your material, followed by visual customization, and ends with distribution and export. The outcome delivers educational content that engages students while producing better learning results.